Monday, September 30, 2013

DIY Fabric Napkins

Wow! Time flies when you're having fun...or in my case working.  After a month of nonstop work events, I'm finally able to spend some time writing blog posts for some of the things I've been working on.

A few years ago for my birthday my mom got me a sewing machine because I had all these great ideas for things I wanted to make, an apron, tote bags, skirts… my list was long.  Since then I have made a few things, but the completed list is pretty short. So when I created my summer bucket list I added a few sewing projects. 

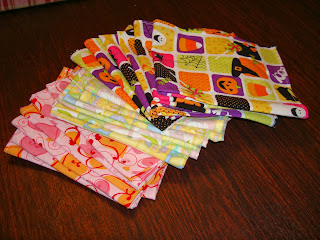
I had about a yard of fabric in different patterns for different holidays, so I decided to make 6 napkins with each design. 


What you Need:

At least 1 1/2 yards of cotton fabric of your choice  
Sewing Machine
Sewing supplies- thread, scissors, tape measure, pins etc…
Iron

Directions:

First thing to remember when sewing is always wash and iron the fabric before starting. It’s always bad if the fabric decides to shrink the first time you wash it.  Then measure the fabric, and figure out how big you can make each napkin. Mine were all cut about 14” in each direction.  

After cutting all the fabric into squares I used an iron to hold the edges I would sew. To make it easier I only did the two, opposite sides.  I folded a less than a ¼ inch of the fabric over, and then folded once more at ¼ inch.

Since the first fold is smaller, I wanted to make sure I sewed it, so I sewed very close to the edge. 
Continue with the same steps as above to fold and sew the remaining edges of your napkins, and you're done. 

The napkins were so easy to make, I decided to buy more fabric to make a few napkins to keep on hand for housewarming gifts. 


Wednesday, July 31, 2013

Wall Art: Canvas Maps

Hi everyone. I finally finished a craft that started a few weeks ago. I made a new art for my wall so I can put pins in all the cities I've been to. I am in love with this idea and I hope it will encourage me to travel more.

What You Need:
Canvases
Map
Staple Gun
Scissors
Ruler

I used two 12" x 24" and one 18"x 24" canvas
My map was 50" x 36" so I was able to cut the map in two 14.5 inch sections and one 20 inch section. This left enough room to fold the map around the sides of each canvas.  I purchased my map here for $10 including shipping.


Monday, July 22, 2013

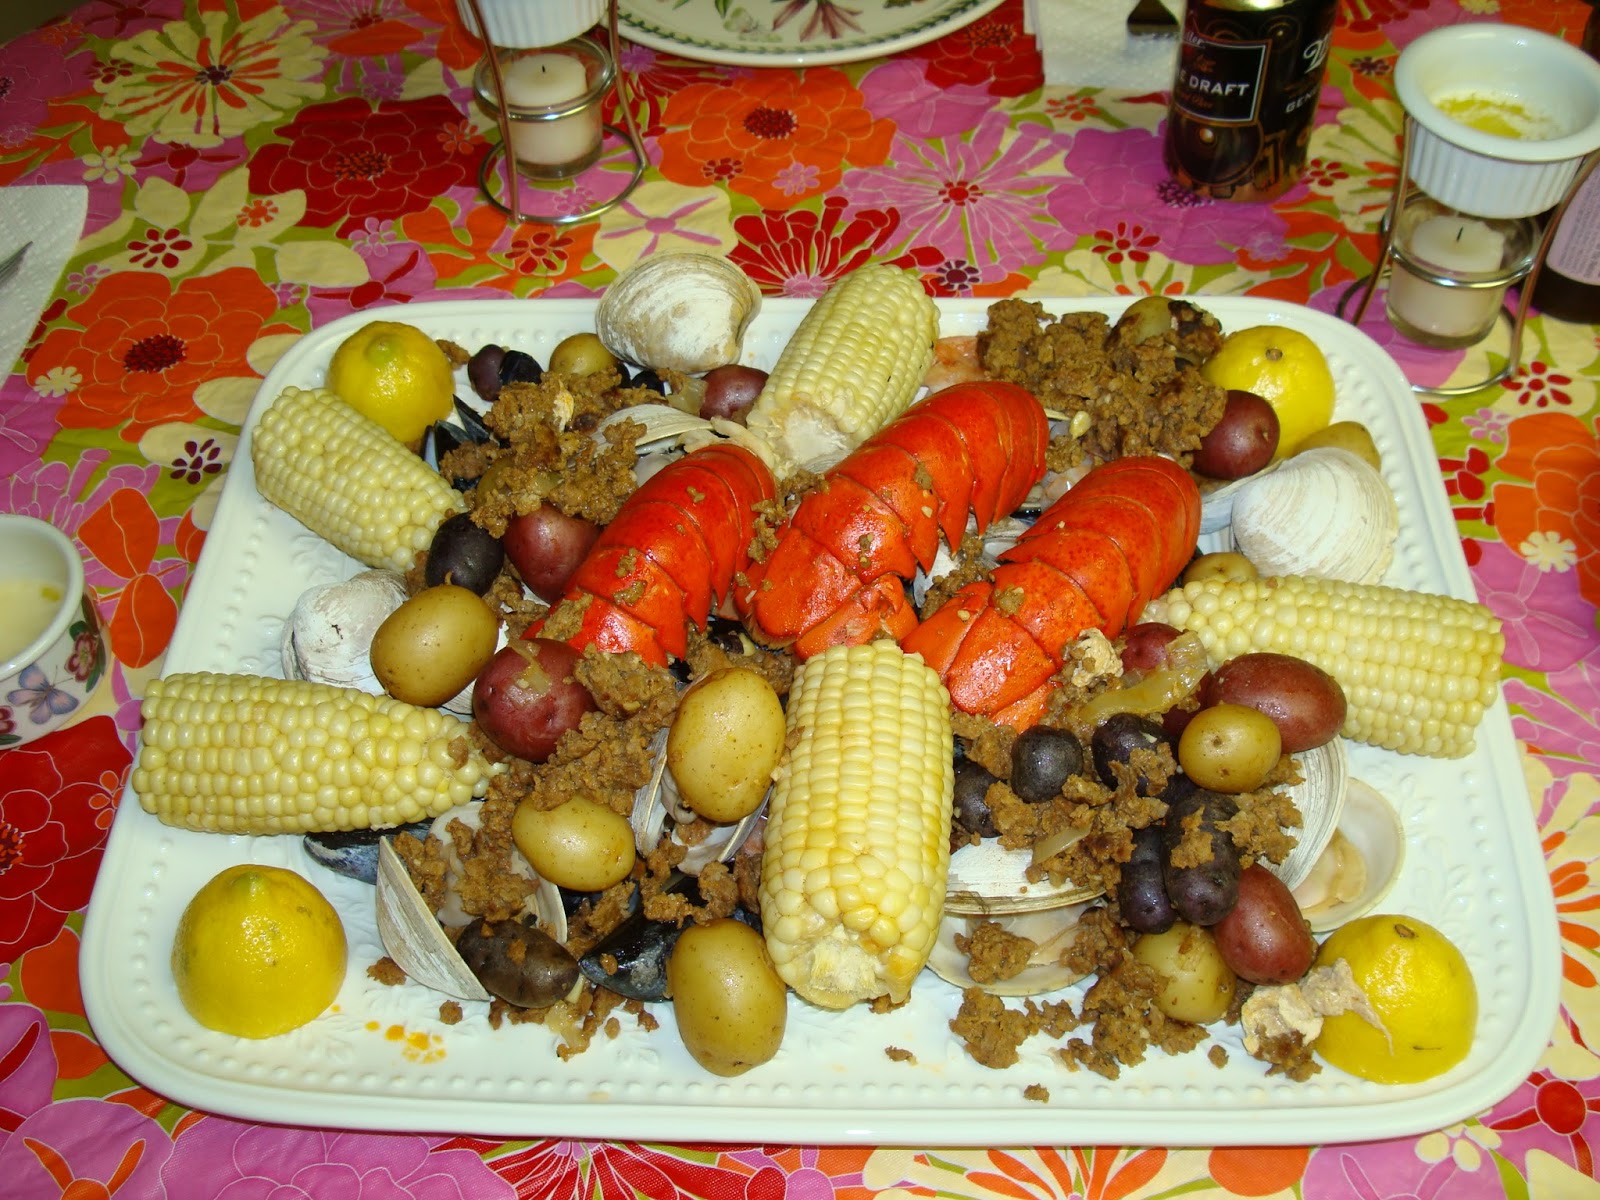
Stovetop Clambake

So I've had this yearning to have a traditional East Coast clambake.  Problem is I am land locked in Colorado. Recently my grandma sent me this amazing cookbook. It has tons of recipes seperated by the region of the U.S. they came from. I will definitely be making my way around the country in recipes.


Inside was a recipe for a clambake and I decided this summer I needed to try it, so the bf and I made dinner for my parents.

What You Need:

2 Large Onions, cut into wedges
6 garlic cloves, minced
1 bottle Pale Ale of medium bodied beer
1 cup water
1 1/2 pounds small potatoes
1 pound dry cured chorizo, we used chorizo ground like hamburger meat
Coarse salt
3 Live lobsters, we used three frozen lobster tails
36 littleneck clams, we used about 20
4 ears of corn husked and halved, we used 3
2 pounds of mussels
1 1/2 pounds large shrimp, shells on
2 tablespoons unsalted butter
2 lemons, halved

16 quart stock pot
Steamer basket small enough to sit at the bottom of the pot


Directions:

Combine onions, garlic, ale and water in a 16-quart stock pot.  Place the steamer basket on top of the onions then add potatoes, chorizo, 1 tbs. salt and bring to a boil.  Add the lobsters, cover and cook on high heat for 15 minutes.  Add clams, corn; cook covered for 6 minutes.  Then add mussels and shrimp and continuing cooking on high heat approx. 4-8 minutes until the mussels and clams open, and the shrimp are opaque throughout.


We changed the recipe a little since there were only 4 people instead of the 6-8 it serves.  We basically just cut down all the seafood by a third.  I'd never had a clambake before but this one was amazing. It has the chorizo in it which made it so flavorful.


Tuesday, July 16, 2013

DIY Candle Votive


On Monday night I was watching a movie, and just playing around with my craft supplies, and before I knew it I had created another craft! The original idea come from Makezine.com


What You Need:

Glass vase, or votives
Rubbing alcohol
Tissue paper
Paper cut out
Mod Podge
Paper, any kind
Paint brush

Directions:

This is a super simple, and cost effective craft for decorating for all seasons.  First use the rubbing alcohol to wipe off the vase. This will help everything stick to it better; just make sure you don’t hold the vase without gloves after this step. Then cut the tissue paper you want to use with the paper cutter.  I had issues with the design I chose tearing the tissue paper. Eventually I found that taping the tissue paper to regular paper helped a lot. I made sure the tissue paper was on the top and the paper on the bottom. 


Once you have enough tissue paper to cover the whole vase, or as much of it as you want, you can start mod podging it to the vase. I found it easiest to put the mod podge on a small section of the vase and lay the tissue paper on it, then put another layer of mod podge on top of it. All the mod podge will make the glass look frosted, so any place you don't want that, use a q-tip to wipe it off. 


Wednesday, July 10, 2013

Fabric Covered Bulletin Board


Hi everyone, I hope you all had a wonderful Independence Day weekend!  I was so excited to have a long weekend.  I spent Thursday at the park where my family has watched almost every fireworks show for my whole life. We obviously have way too much fun with glow sticks. That my sister being handcuffed; my sister's bf, her, and my dad; and then me and the bf below. 


Saturday I planned to do two of the crafts I've wanted to try for a while. The first craft was to glue a map onto canvases to put pins in for all the places I've been. BUT it just wasn't my day and that craft is now waiting for another map to be sent in the mail.  So keep an eye out for that post and more on my crazy day.  

Second attempt at a craft went much better when I updated an old bulletin board by covering it with fabric.  The original pin was found at The Newly Wife

What You Need:

Bulletin Board
Enough cotton fabric to cover the bulletin board and go around the edges
Staple Gun
Nail head pins, or thumbtacks
Spray Glue for Fabric


Directions:

I found it easiest to lay the fabric down on top of the bulletin board in the way I wanted it, then flip it over and stapled one side of the fabric to the back of the wood border on one side. Then I flipped the board back over and started on the side where the fabric was stapled and in small sections sprayed the board with the spray glue and then pressed the fabric onto the board. Make sure to keep the fabric taught and start in the middle of the board and work out to smooth out all the wrinkles.

After all the fabric was glued on I flipped it over and stapled the fabric to the wood border on the opposite of the already stapled fabric.  Then I folded the edges over and stapled the two opposite sides.  Since I glued and stapled the fabric, I figured it was safe to just use thumbtacks to border around the edge.  And I liked the color of them the best.  


 (Yes my wall is neon pink, that's the color I picked when I was a teenager, and my parents never changed it)

Sunday, June 30, 2013

Chevron Art

This weekend was very productive on the craft front.  The boyfriend was working at a race in Colorado Springs, and I didn't have a work event so I had all of Sunday to get things done.  I've been working on this one for a while, going through magazines and making a collection of pages, and I'm excited it's done.  I really like this craft!

What You Need:

Posterboard
Spray Adhesive
Magazines
Scissors
Ruler
Paper Cutter
Cardboard


Directions:

Go through magazines and tear out all pages that have bright patterns. A lot of ads are really good. I also had a few issues with home magazines that has pictures of flowers and fabrics that work well.  Even if you don't think a picture or pattern is big enough, save it because you'll have smaller parts to fill.

I cut a 1.5" x 6" strip out of cardboard and used that and a round cutter to cut the magazines.  I quickly realized I'm not very good at doing that in a straight line, so all the strips were turning out to be different sizes. I couldn't think of another way to cut them, without using a pen, which could show up after cutting. So after the strips were all done, I used a paper cutter to trim them all down to 1"x 6" strips.


Next you just spray the back of each strip with spray adhesive and place onto the posterboard in a chevron pattern.  After all the strips dry, cut off the edges that went over and frame. The only bad things about this were... 1. I didn't make my chevron pattern straight, and I'm a little OCD so it's driving me crazy! 2. I had the spray glue ALL over my hands. I did find out that nail polish remover is a great way to get the glue off my hands.


**My BFF loved this art so much she wanted one for her birthday.  
Hers came out a little better than the first one, I got the chevrons to be straight**


Monday, June 10, 2013

Glass Vase Upgrade

I'm offically a guest blogger! Today I was featured on the Thrifting Denver blog, with a simple craft updating glass vases. Since Thrifting Denver is the offical blog of Goodwill Industries of Denver, I grabbed 3 vases from a Goodwill store for only $6.

What you Need:

Glass Vase or Glassware
Indoor/Outdoor Spray Paint
Painter's Tape


Directions:

Cover the part of the glass you don't want painted with tape. Spray one coat of paint, let dry for 15 minutes and repeat until you have an even color.


Thursday, May 23, 2013

Paper Leaves

What you Need:

Floral wire, any size thickness would work. 
Scrapbook paper, more designs are better, I only used 4 and wished I had more variety
Cardboard
Glue, I used Tacky Glue
Scissors and/or exacto knife
Cutting board
Sticks or branches

Directions:
Use cardboard to cut out a few leaf shapes to use as a template. It may be easier to use an exacto knife to follow the cardboard, or to draw an outline of the leaf with pencil then use an exacto knife or scissors to cut them out.

Try to make the leaves uniform as possible, it makes it easier when putting them together later on.


I made three different sizes of leaves.  I also found it was easier to cut the floral wire into various sizes and try to flatten one side as much as possible so it doesn’t poke through the paper.


Once you have all your leaves cut out start pairing them up so a different design is on each side of the leaf. Then glue them together with the wire inside. I used tacky glue and some of them accidently dried with a curve but it ended up making them look like real leaves so I did it with more.

After they dried completely I used my exacto knife to clean up the leaves since they weren’t all the same size.  Then I started attaching them to the sticks. I had one stick and one branch to get a few shapes. 


Monday, April 29, 2013

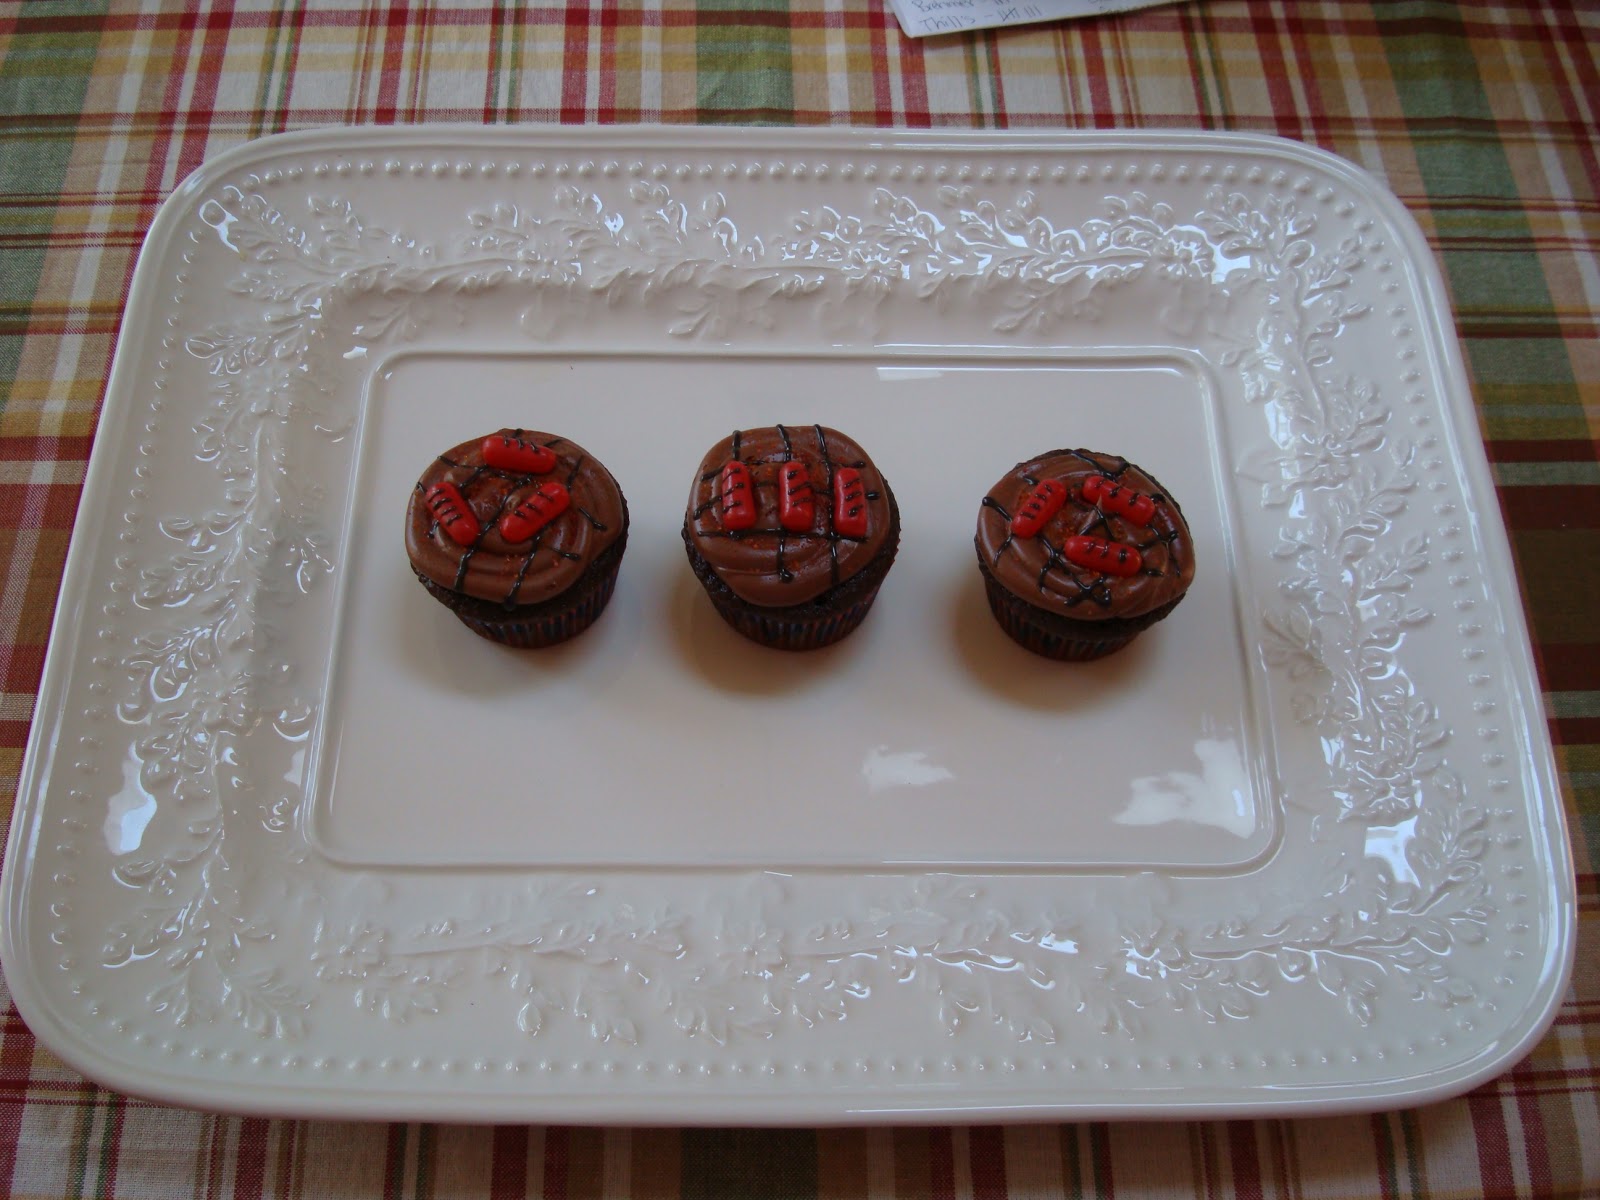
'Hot Dogs on a Grill' Cupcakes

Colorado weather tends to be a bit bipolar in Spring and Fall. In a matter of a few days we can have snowstorms that cancel school and 75 degrees. Heck, that almost happens in one day. but since the weather has been getting warmer BBQ season has started in full swing and I made these adorable cupcakes.


Tuesday, April 23, 2013

Flash Mob for Wish of a Lifetime

Nice to see all of you again! I realized I haven't posted in more than a month. But that's what happens when you have two jobs and lots of events going on.

The past week I had Flash Mob at Denver International Airport, a 900 person fundraising lunch, and a 1,200 car auto show! I could really use a vacation.

Since I don't have Pinterest things to post right now I thought I'd share my Flash Mob video with all of you (Yes, I did dance in it, and I was so nervous about forgetting the moves I didn't smile at all). We had this flash mob for Wish of a Lifetime (www.seniorwish.org) to send Alma, a Wish recipient, on her trip to Graceland.

Alma is an adorable 84 year old who is a huge Elvis fan and had never been to Graceland  until last week! You can read more about her passion for Elvis' music and her fight to end segregation in the San Diego school district here: http://smu.gs/11BlCC9.